Follow this tutorial to learn how to sew a face mask with filter pocket, wire and replaceable ties or elastic.
Disclaimer: Fabric face masks DO NOT replace surgical masks, they should be used only in case of emergency when supplies are limited or non- existent. Such as during this Covid-19 crisis. These masks should always be used with an effective filter inserted. Such as HEPA filters or any PM2.5 filter. Change filters DAILY for optimal use and wash the face mask DAILY in hot water with laundry detergent. Cloth masks are not considered personal protective equipment, they are less effective then surgical masks (but better than nothing) and are not approved by any health organizations that I know of. This post contains affiliate links at no cost to you. I appreciate the support!
Follow this full YouYube tutorial for an easier understanding of how to sew a face mask with filter pocket.
Face Mask Materials:

FABRIC: (PREWASHED 100% lightweight cotton woven fabric recommended)
- 15″ by 7.5″ STANDARD
- 15″ by 9″ LARGE
- 9.5″ by 2.5″ BINDING
- 14″ by 6.5 SMALL KIDS SIZE
- 14″ by 6″ EXTRA SMALL KIDS SIZE
- 9″ by 2.5 BINDING FOR BOTH KIDS SIZES
WIRE:
- 4″ piece of wire (recommended 20 gauge wire but alternatives can be used, such as pipe cleaners, paperclips, floral wire, jewelry wire, twist ties)
TIES:
- If using elastic: cut two 8.5″, no more than 3/8″ in width.
- If using ties: use two 44″ length ties (these can be made from shoelaces, cord, cut up T-shirts or leggings.
- Best Adjustable Face Mask Elastic to attach.

How to Sew a Face Mask with Filter Pocket
The finished face mask with filter pocket measurements are approx
7.5″ by 3.5″for a standard size and 9″ by 3.5″ for a large size.
Please Note: I only used red thread so you could see the stitches. I suggest using a matching thread to make things look more professional.
STEP 1:

Serge or zigzag the short edges of the main piece of fabric. (this step can be skipped if preferred).
STEP 2:

Fold the main piece of fabric in half so both surged edges meet. Make sure the right side of the fabric is facing in.
Then sew a 1/2″ seam allowance along the serged edge 1 1/2″ in from each end (2″ for a large, 1″ for the kids size).
This opening will become the Filter Pocket.

STEP 3:

Press this seam open and then turn the fabric right side out.
STEP 4:

Topstitch along ONE side of the seam at 1/4″.

STEP 5:

Then measure 1/2″ from the seam that is without topstiching, fold and iron the mask leaving this 1/2″ at the top.
STEP 6:

Find the center and mark a 4″ section. This is for the wire you will insert Then stitch over these marked lines.
STEP 7:

Take your 4″ wire and curl the ends in to hide the sharp edges.

Next, Slip it into the casing and clip or pin it as close to the top of the fold as possible.
STEP 8:

Topstitch at 1/4″ around the entire square making sure to avoid sewing over the wire.
STEP 9:
Lay the square face up with the inserted wire at the top. Then make three folds, evenly spaced. Tucking the fabric under so the opening to the folds face down (I eyeball this part).

Then, pin these edges in place, iron the folds and sew a topstitch along both edges at 1/4″.
STEP 10:

Take the binding, fold both edges in at 1/2″ each side and iron.
STEP 11:
Cut the binding in half creating two strips.
STEP 12:

Take one piece of the two bindings, open one flap and line it up along the side of the mask (front of the mask facing up). There should be around 1/2″ overlap on the top and bottom edges. Fold these over to the back of the mask and clip in place.
Sew along this edge at a 1/2 ” seam allowance.

Do this with the second piece of binding on the other side of the mask as well.
STEP 13:

Pull the binding out and lay both edges flat. Sew along these edges, this helps later when replacing the ties or elastic as they won’t get caught in these folds. (Some people may skip this step but I think it is very important to the end product).

STEP 14:

Fold the binding over to the back side of the mask, pin and stitch this, leaving an opening on the top and bottom of the binding for the ties to go through.

STEP 15:

And lastly pull your elastic or ties through the two loops you created with the binding.
An easy way to do this is by using a safety pin attached to one end of the elastic or tie, this helps pull the tie through the loop quickly.
And that is how to sew a face mask with a filter pocket and replaceable ties!
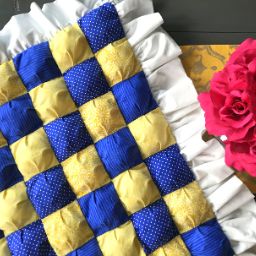
Below you can see the difference between standard size and large size. The blue and white ones are standard size, the grey one is the large size.

I hope this face mask tutorial was helpful, PLEASE leave me any comments on variations or other helpful tips or ideas you may have to help others as they make their own facemasks.
Share by Pinning the below image:

Feel free to check out my other sewing tutorials to find more projects to keep yourself busy during our self quarantined time.
And I hope you are well and feeling God’s peace during this uncertain time.


do you have a size recommendation for a childs mask?
I would suggest making the standard size to see if it fits, It does fit my boys. However you could just take and inch off the side and bottom to see if that could help a smaller face.
What size do you cut the filter?
Tamara – Thank you for this tutorial! I made pleated face masks like yours, but without the pocket opening. I will now modify my mask to have a pocket for my Hepa filter material. Your photos and instructions were very clear and easy to follow.
Sincerely,
Beth Wolfe
where do you get hepa filter material?
I don’t know where she got the material but I have heard of people buying HEPA vacuum bags and cutting sections from them to use as filters (taking out the plastic lining). It’s obviously not tested to be used for people but in desperate times…
Hello Tamara;
This is the best tutorial of how to make a mask.!
Nice pics, notes / info, and your explanation, how to cut
( inches/centimeters) and assemble and sew the fabric pieces together, etc… (light cotton) are very cool…perfect…! *****
Thank you very much for your very nice tutorial.!
Congratulations.! 👍
Kind regards…
Lili ⚘
tu: 12 may 2020
Belgium / België / Flanders
Very explicit tutorial! Appreciated you giving us the seam allowances! Very crucial when sewing the masks,no guessing game
I have made several of these type masks. Your tutorial is the best one I’ve watched. I appreciate your clarity and how precise your directions were!! Great job!! Now I’ve made lots more!
Thank you for sharing! I so appreciate hearing that the video has been helpful. Happy sewing!
That’s wonderful to hear! Thank you for sharing, I am so glad it has helped.
Thankyou…a beautiful design..especially the replaceable ties..unfortunately..I do not have a sewing machine…and have wondered if the iron on material would work ..or a non toxic glue (Sugru)
I am not sure glue would work with this mask for the long term. And it wouldn’t help in the medical field. But if you are just making it for yourself using Hot Glue might hold this mask together for the short term?
You can try to hand sew the mask!
Yes! That would be a better option to glue.
Thanks for making this so easy….I am going to try to make some of these to give out to our family as may of our relatives are older and not in very good health…..I wish Good Health and Wellness to you and Your Family.
It is my hope that this tutorial can help us stay safe. Thank you for sharing and wanting to make masks for your family. God Bless You!
Wish this could be printed in PDF form or even have a print button on the blog post to minimize it down to just the steps of the pattern and print it.
I considered making a pdf but ran out of time. My boys have started online school, it sure is a steep learning curve! But I would suggest highlighting the post, right clicking and then printing? I have done this in the past and it has helped. I will work on a pdf for the future.
I made it into a Word document and it printed out nicely. If Tamara wants to distribute this, I will email it to her.
question: is the pipe cleaner removable for washing??
No the wire stays put during the wash.
I didn’t sew the pipe cleaner closed all the way. I wear this mask every day for work. When I washed it with the pipe cleaner, the wire ended up breaking on several masks. Instead I skip about 1/2 inch on both sides of the cheek area (beyond where the wire naturally sits). When I wash my masks I remove the wires and wash them by hand. The wires do eventually wear out, but I find they last longer if I do this.
What a great idea! Yes, I did wonder if a better wire was used (such as a paper clip) if it would last longer. But being able to replace the wire is a huge help! Thanks for the suggestion.
Thank you so much for a clear and concise video tutorial with audible and language clarity, as well! And step-by-step photos, too. I am working on a bunch of masks for a couple of local groups and was given a sample and measurements, but no instructions! Your pattern and tutorial is exactly what I needed. It was quite easy to view this on my phone and pause the video as needed to work on a section at a time.
Suggestions: paperclips may not be a good option because many I have worked with for other projects break quite easily (perhaps a cheap brand). I am working with both floral wire and pipe cleaners (or chenille sticks), and find the pipe cleaners to make a smaller loop at the ends, making it easier to sew around.
Also, my helper accidentally ironed 5/8″ at the top instead of 1/2″, which gives a bit more wiggle room to sew around the wire. The wire loops are the trickiest to sew around – BE CAREFUL as it pulled the machine needle out, bending it.
A friend who is also making all kinds of masks, using different patterns, suggested cutting up old cotton shirts from your closet you no longer use. She plans to take the logo off of a couple of shirts for a “work mask.”
Thanks again Tamara! I don’t often post my thoughts on tutorials, but felt I absolutely needed to today, especially in this time we currently live in. You are a joy to watch! You clearly are helping others! God’s richest blessing back to you and keep creating, using your talents and sharing!
New fabric is specified. Old shirts have been laundered a lot and are thin and not effective. That is where all that link in clothes dryer filter comes from.
Question?
I haven’t sewn in years, but the stitch that goes all the way around looks bigger than ¼ inch. Is it ½ inch? Does it make a difference ? I guess I will stop for now.
Thanks for the nice presentation and video.
Barbra
Along the top by the wire it is more like 3/8 of an inch but the rest can be between 1/4 of an inch to 1/2 of an inch. It doesn’t have to be precise. In the video I eyeballed it 😉
By the wire, you do what you can to avoid hitting the wire. Keep the rest at 1/4 so it will be hidden by the trim pieces that you add, to look the best.
True!
Love your easy to follow video and step by step instructions. Thank you!
As a retired nurse and using different masks, I find a longer nose wire more comfortable and gives a tighter fit. I am using a 5 in piece of floral wire with edges curled over and thereby increasing the opening for it accordingly. Just a small change.
Thank you for this wonderful tutorial, Tamara! I’ve made several of these for family and friends. The standard one works perfectly for me and my sons (age 12 and 8), and I’m really pleased with how tight-fitting this is. I bought an xtra-large black t-shirt and cut one inch strips from the bottom – this is enough to make the two ties for one mask using the handy trick you show in your video. Thanks again!
I am so glad to hear that! And those stretchy ties really are the best way to go. I made some with shoelaces but quickly replaced them so they all had the stretchy ties.
Thank you so much for this tutorial. After several other tutorials and styles, this ended up being the winner for best fit and style for all the members of my family, from very large headed men who hate earlobes. To my 4 and 6 year old kids.
I ended up making a few adjustments to meet our preferences.
1. I didnt have enough of some preferred prints to do the whole mask in one piece so I had to do a different plain cloth on the inside. I drew a diagram to figure it out, and the outer piece (womens size) was cut 7.5″w X 8.5″ l. The inner fabric was 7.5″ x 6.5″. I added the step of piecing the two pieces with a seam along the bottom first before proceeding with the filter pocket opening seam you start with. When I press the top seam flat, I also press the bottom seam up to allow the outer fabric to wrap around from the front and overlap to the back about 1/4″.
2. I used a non woven medium weight sew-in interfacing as a type of filter, I made it match the liner fabric, 7.5″x 6.5″ and it was pinned to the wrong side of the inner fabric until I sewed it in.
3. I left a 1/2″gap on each end of the nose wire enclosure to allow the wire to be removed or changed or adjusted.
It was all I had so I used fold over elastic(like baby headbands) for straps, I circled through both side casings and tacked them with a few stitches in the bottom on one side. It makes two straps over the back of the head but they cinch through the casings and hold nice and snug but still comfortable.
Hope that all helps!
Thank you!
That’s wonderful!!! Thanks so much for sharing, I am sure it will be helpful for others trying to make their own masks. We have to get creative with what we have when fabric stores are closed 😉
It is a great pattern; thank you so much for putting it on youtube.
Please check you text. Twice I found “batting” instead of “binding”. I figured it out eventually, but it would save confusion if you changed it.
YIKES! Thank you! that’s what I get for rushing this post. I wanted to get it out while people still needed the help. I will make those corrections.
Are you able to change the elastic and feed it through the casing?
For sure! Just sew the elastic into a loop along the elastic itself. So it doesn’t attach to the face mask. Then it can be cut out and replaced. Or it could be knotted I suppose.
What can you use if you can’t get any filters.
Coffee filters?
Thank you
Diana Belchak
In the description of the YouTube video I have linked to filters that can be ordered for the face-mask. But if filters can not be found, using it without anything else is better then nothing. I have also heard of people using a layer of flannelette or even wet paper towel in a pinch. But I can’t say they will do anything. Of course being in this weird time, and being unable to access proper products anything is better then nothing!
The green reusable bags that are sold at the dollar store are very water resistant. I have been cutting them up for a filter. Only 3 for a dollar. 3 bags make tons of filters
Hell and thanks! Makeing for a friend who’s daughter i law must go to hospital to visit premie, good work you did, look at the difference you’ve made!
Only one question. Using hepa vac bags for filter. What size to I cut, I don’t want to experiment and waste any!
Thanks again, Sue
Sue! Somehow I missed this comment. I am assuming I am too late, I hope your friends preemie is doing well. As for cutting filters, I haven’t had to do that so I don’t know. But I would cut the filter longer then the face mask (when it is laying flat) as it does stretch when the pleats spread out on the face.
Please be very careful using vacuum filters. Many vacuum maker sites Do Not recommend these as they may contain particulates not safe for human inhalation.
Excellent video very clearly explained. Now I must get to work on some.
Happy Sewing!!!!
Super easy
Thanks Tamara , Ive been making masks for a while and doing them as per your video , it’s the best teaching video I’ve seen anywhere . Your instructions are clear and concise and easily understood .
Thank you .
Irene .
Thank you! It means so much to hear that. The whole goal was to be helpful and I feel so much joy knowing it has been in fact helpful 🙂
Thank you for the instructions as well as the video. It makes it so much easier. Thank you also for being on top of mask making during our COVID outbreak and helping make a difference in peoples lives.
Blessings to you and your family,
Carol
Your welcome! As much as this post has helped others it sure has helped me too, being able to help in any way I can keeps me a lot calmer. God Bless you and your family. Happy Sewing!
You make this pattern super simple to put together and your instructions are easy to follow! However, do you have pattern sizes for children? I have 3 small grandkids and would like to make them a mask!
Thanks for taking the time to share your talent!
I am so glad this tutorial was helpful! I do not have anything for children, but I would suggest starting by just taking off an inch or two from the sides of the regular sized one. I have heard from others that the size regular also works for kids. But probably not for the littles.
I am an amateur but sewed a mask last night-I’m so thankful for your clear instructions!! The only question I have is about the dimensions of the fabric. You posted 15” for the length but the photo seems to show 17”. I’m wondering if that’s why my pleats seem kind of shallow compared to yours. Any thoughts?
I am so glad you tried to make one! Practice makes perfect. My pleat explanation probably could have used some work as I really just pinched and guided the pleats instead of measuring them. 15″ is correct although if you want larger pleats you could add another two inches? The pleats themselves can be measured at 3 – 3/8” pleats. Hope this helps?
This has the clearest instructions i have come across. Thank you! Going to start making them tomorrow.
Thank you so much Tamara – your tutorial is very well explained !! I like ++ the simple way to make the pocket for the filter.
I forgot to mention: I doubled the pipe cleaner and twisted it to make it a little bit more sturdy.
I’ve tried a few mask tutorials and I found yours to be the best – thank you! Is there an easy way to modify the fabric measurements so I could use 2 separate pieces of fabric (i.e. a print for the front and white for the back)?
I really like your instructions, there easy to understand and follow. It would be helpful to know how to finish top if you don’t have a serger .
Hey! Just wanted to say that you did an excellent job with the photos, the writing, and organization of this tutorial. I have a very hard time with directions and this was super easy to understand. Thank you so much!
Wow, thank you for creating a very well explained and demonstrated tutorial. Very thorough and easy to understand.
Thank you so much for this wonderful mask, I am having trouble with the ties though, is it really 40 inches if using a t-shirt?
outstanding tutorial. i really appreciate how you clarified each step. i’m a novice sewer and this demonstration was so helpful to me. thank you so much.
Thank you for the video. Your method makes the most sense of all I have seen. 👏🏻
Thank you so much, I will try this, your instructions are easy tp understand
This was so well composed and we thank you for your tutorial.
I’ve read and watched loads of mask tutorial by now and yours excellent, the clearest and easiest I have seen. Thank you. FYI, another mask tutorial had a great suggestions for nose clips: the flat bendable clips that come on coffee bags. I have found these to work well. Stay safe.
God bless you also! I’m going to try- I’ll post a pic hen i do!
A tip for the bendable nose piece. I saw another mask maker suggested luster leaf soft wire tie. I ordered and got it today. I believe it will work! I have been using pipe cleaners doubled to make it stronger.
I just finished my first mask using your pattern. It was a lot easier to make and I love how it fits. I used twist ties for the nose piece and lycra instead of elastic. I think that it will be easier on the ears.
This is great but I’m having trouble getting a HEPA filter into the pocket. Since mask is pleated on both sides, filter is difficult to slide in and arrange so it is smooth. Also, filter can’t be pleated so it doesn’t form fit with the mask. Can you please tell me what I’m missing? I’m obviously not doing something correctly! I’m not a seamstress (yet) but my mother was an amazing one but she’s no longer here to help me. 😪 Thanks
Thank you for this very clear explanation. I am sure even those with ten thumbs will be able to make a mask now. The photo’s are also clear and leaves no room for uncertainty. A very good teacher !
Love this pattern. I’ve made 17 for family and us and helped a friend make 5 more. Thanks for sharing such well diagrammed instructions Easy to follow and make
Thank you sharing your face mask tutorial. The instructions were very clear. I made two, one for my husband and one for myself. I haven’t sewn for a while but I soon got the hang of it.
Thank you for your wonderful pattern. So kind of you to share. Hope you and your loved ones stay safe during this COVID-19. This will be helpful as I am making MASKS for 4 family members that are first responders.
Thanks again,
Priscilla
Thank you so much for this tutorial!! It’s very easy to follow along.
My favourite element is the removable ties! And that I can use an old t-shirt for them…great idea! I am pretty much a non-sewer but was able to follow along. Thanks for being a patient teacher – a difficult task when you do not have an immediate audience response!
Can I use jeans instead of fabric?
Or can I use a T shirt?
Going to make it.
Thanks for the great tutorial! What size of filter do you recommend putting I side?
Could I use interfacing between the two linings of the masks?
Thank you for being so kind and sharing your knowledge and gift with others. Health and peace to you and your loved ones.
I have been researching face mask patterns (and making a few samples). Your pattern has everything I have been looking for: a top opening for a filter, a nose wire and removable fabric ties. The only thing I will change is to have the ties as one long piece of cording that starts as a loop behind the neck and then ties in a bow. Thank you so much. Your instructions and video are clear and if I make mistakes it will be my own fault!
Thank you for your great tutorial. I have made a couple masks and much prefer this design. Your tutorial was easy to follow – much appreciated!
I love how you explain each and every step. Thank you so very much. Yes God’s love is the only thing that will give this world peace.
good tutorial, very easy to follow step by step. I did it but made the ties to go around my head and neck. and made some with elastics for the ears. thank you.
Awesome job on both making the mask & Educating. You spoke very clearly. Your pictures are helpful. I enjoyed the red thread on the white material so that we could see clearly where to sew. Great Video…I just started sewing masks . .I wrapped together a few of the green coated wire hooks used for Christmas bulbs ,for my nose piece & sewed them into a small piece of material then inserted them into my mask .Thank you. Stay Safe Everyone.
Thanks for your great tutorial for the face mask, just one question for the version with elastic, did you cut a bit bigger and stitch together and pull ends inside casing. I thought about cutting 7.5 inches and using the half inch for sewing together, hopefully this will work. Stay Safe everyone!
Hi Gwen, yes, cut a bit bigger so they can be sewn together and then the sewn part can be pulled in and hidden within the looped section. Hope all is well with you!
This is the best I’ve ever seen…so easy to follow thank you!
Thank you! I am glad I was able to help 🙂
Very informative tutorial, thank you,
Hope all is well with you, keep safe
God Bless x
Your instructions are simple to follow and the result is a nice fitting mask. Thank you!
nicely displayed…stay safe…..Carolina Caruso
I haven’t made it yet but I will do. Looks good . When I made it I will give my critique.
Thank you for this great tutorial. It’s well explained; my face masks turned out really well!
What is the best fabric to use for the filter when making this mask . Thanks Lorraine loral@telus.net
This is the very best pattern for pleated masks. I purchased 2 and now I am trying to make more. Thank you.
Excellent! Very proud of you. I really like your method. My other layer is cotton Cream as I am using my bed sheets but thick I can’t go shopping & I have cotton white bed sheets is very thin. So I am thinking of making cream color outer layer & thin white inner layer. How can I make filters insert space. I am trying to help make masks for friends for donations & help others. Should I cut other layer bigger than inner layer. Thank you very much.
Thank you! Using two types of fabric will not change how you use the pattern. You will still want to make both pieces of fabric the same size. Happy Sewing!
I really like the mask with the filter insert, I am unable to print the free pattern you have shown. Please advise me how to do that. I have the materials and live in a 55+ Apartment. I’m 83 year old great grand mom and wanted to give my family the masks. I like to sew, but need a pattern to follow. Thank you and be safe.
I love this idea thank you for sheer
What a helpful idea, thank you for sharing. God bless and stay safe.
I love the way this is explained, it is nice and clear for people like me who are not expert at sewing. Nice easy to follow instructions. Thank you, Stay safe.
Thank you so much for take the time doing this tutorial is was very helpful to make my own mask and I did for my friends too thank you.
Thank you for your tutorial – great help!
What size would you use to make a child’s mask?
What measurements should the filter be to insert in mask? Thanks for the great pattern.
What type of filter do u recommend?
Bless you for this great tutorial. I have struggled with the casing but your instructions are so clear!
Stay safe! Thanks for your easy to follow guide❤️
Thank you so much! I had made a different style that just wasn’t comfortable but these are awesome!
Great, I hope I can follow and do the masks!
I’m also looking for a pattern using 2 fabrics , a 9 1/2 “ x 7 1/2 “ with the pocket and filter. Can you share one like that with me? Thank you.
Barb
Great job on tutorial and your directions are wonderful! You make my sewing job easier! Thank you so much!
Mary from Wyoming
Great tutorial!
I’m subscribing to your channel.
Thank you so much! Tomorrow I will have a tutorial come out that will be how to sew a face mask for a child. I hope you like it 🙂
Thanks so much for this great pattern, I have made over 30 of these for family and friends so far. A couple of changes I made were to stitch the side binding from the back first, so you only see the one seam on the front, and as I use a narrow elastic, I lay it down before the final sew line so I don’t have to pull it through the casing.
Thank you for sharing your adjustments! I have a new tutorial with kids sizes and I started using a really soft elastic for behind the kids ears. Here is the link if you want to see how to make this “elastic” https://youtu.be/XDs_VYQjxJk
I’ve made many of these; not the fastest but the best fitting so far!
FYI – just so everyone knows, research shows that the best filter is a piece of 100% silk.
It looked like you’ve used a lighter fabric for liner. I’ve done that in other masks. Cutting dimensions to do that? Just halve it?
I didn’t actually make a liner. What I can figure you are seeing is the back side of the fabric inside the pocket liner itself. With the fabric folded in half you end up using the same piece for both the inside and outside layers. hope that helps!
Very clear instructions, just what I was looking for. Thank you so much!
I am trying this. I have not had a lot of luck with pleated mask. I do ok with outer styles, but a friend gave me some Christmas fabric that she wants in the pleated style. Thanks for your instructions. Wish me luck.
Lots of Luck!!!! The first one is always the hardest but once you understand the concept it’s pretty easy to make more 🙂
Measurements for binding missing and would love measure for lined mask. Muslin inside
Thank you so much for your tutorial. Now I have to start making more mask for my grandchildren as they start back to school. How much elastic cord would you use for a young child (5 yrs old) and a 10 (year old)?
I have the elastic cord and will tie it in a knot instead of sewing it together. Again thank you so much for the pattern.
Hi Madeleine, now that we are able to buy product again I would suggest using these elastics. I bought a bunch and they are so nice and soft for my boys ears: https://amzn.to/3CJ5ZAJ Hope that helps!
Well Tamara, it’s been about a year and a half and I’m still referring to your video and instructions for making face masks. Just wanted to let you know I so appreciate that you made this. It has literally been a “life saver” for me as I am 75 years old. I wear my cloth masks everywhere I go (once I started going out again to stores, etc.) I also put filters in them and so far I have avoided getting Covid. Sure hope this goes away some day. I am fully vaxed but still wear my masks when I go around people. Just got done making one new one for Christmas and have another one in the works for the New Year! Thank you so much and Happy Holidays!
Hi Diane! Thank you so much for sharing that with me. I am so glad this tutorial has been so helpful for you and even more so that you have not had covid! May you feel Gods Blessings as you move forward into 2022 and happy sewing!