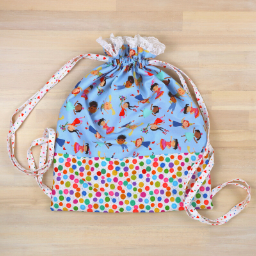
This easy tutorial teaches you how to sew a drawstring bag with lining. It comes with a free pattern in four different sizes and a YouTube video to walk you through all the steps.
Watch the drawstring bag video tutorial HERE:
This post contains affiliate links at no cost to you. I appreciate the support!
Drawstring Bag Dimensions and Hem Allowances:
EXTRA LARGE – LARGE:

- Cut 2 pieces of fabric for the inside and outside of the bag at 68″ by 28″
- Cut two pieces of fabric at 24.5″ by 5″ for the loops.
- Attach loops with a 1/2″ seam.
- Sew side edges at a 1″ seam.
- Mark the bottom triangles at 6 1/2″, sew directly along this marking.
- Attach the bags together with a 1″ seam.
(This size can become a large by folding over the excess fabric, OR cutting the two main pieces of fabric at 54″ by 28″ which will make the bag shorter.)
MEDIUM:

- Cut 2 pieces of fabric for the inside and outside of the bag at 38″ by 18″
- Cut two pieces of fabric at 15″ by 3″ for the loops.
- Attach loops with a 1/4″ seam.
- Sew side edges at a 1/2″ seam.
- Mark the bottom triangles at 4″, sew directly along this marking.
- Attach the bags together with a 1/4″ seam.
SMALL:

- Cut 2 pieces of fabric for the inside and outside of the bag at 28″ by 14″
- Cut two pieces of fabric at 11″ by 3″ for the loops.
- Attach loops with a 1/4″ seam.
- Sew side edges at a 1/2″ seam.
- Mark the bottom triangles at 3″, sew directly along this marking.
- Attach the bags together with a 1/4″ seam.
X-SMALL:

- Cut 2 pieces of fabric for the inside and outside of the bag at 18″ by 8″
- Cut two pieces of fabric at 6.5″ by 2″ for the loops.
- Attach loops with a 1/4″ seam.
- Sew side edges at a 1/2″ seam.
- Mark the bottom triangles at 1″, sew directly along this marking.
- Attach the bags together with a 1/4″ seam.
Fabric used for these bags:
Outer Upholstery Fabric: USA and CANADA
Inner Linen Fabric & Loop Fabric: USA and CANADA
How to sew a drawstring bag with lining:

Before jumping right into the sewing tutorial please note that this tutorial and all the bags I made were created with stiffer fabrics, such as Home Decor Fabric and Upholstery Fabric. This is what allows them to stand on their own. However, depending on your needs for the drawstring bag they could also be made with Cotton Fabric.
STEP 1:

Cut all your fabric following the dimension list at the top of this tutorial.
STEP 2:

Take the two smaller pieces of fabric and fold them in at a 1/4 inch seam on both short ends, iron and fold one more time.
Then sew along these freshly pressed folds.
STEP 3:

Fold these same smaller pieces in half (long ways), Iron. These will become your loops.
Then attach both loops to the short ends of one of the larger piece of fabric that you cut. Right Sides Together!
Make sure you attach the loops to the fabric you want as the outside of your bag. Then sew them together at a 1/4 or 1/2 inch (depending on what size bag you are making).
STEP 4:

Take the large fabric you determined to be your OUTSIDE fabric fold in half with the right sides facing in.
Sew along both sides at a 1/2 inch or 1 inch seam (depending on what size bag you are making).
STEP 5:

Take the large fabric you determined to be your INSIDE fabric fold in half with the right sides facing in.
Sew along ONE side at a 1/2 inch or 1 inch seam (depending on what size bag you are making).
Sew along the opposite side leaving an opening between both seams. This will allow you to turn your bag right side out later. This opening will depend on the size of the bag. A larger hole is needed for a larger bag.
STEP 6:

Take the outer and inner fabrics and fold in half to create a triangle bottom.
Measure from the bottom up, marking a line where you will sew along.

These measurements are listed under the specifics of each bag size.
Sew along the line and then cut the point off. I cut about a 1/4 of an inch away from the stitch.
STEP 7:

Turn the inside lining right side out and insert it into the outer fabric. Keep the outer fabric wrong side out.

Pin (using these awesome sewing clips) along the top and sew at a 1/2 inch or 1 inch seam (depending on what size bag you are making).

STEP 8:

Pull the bag right side out and sew the hole in the inner lining shut.

Sew this seam as close to the edge as possible.
Then push the inner lining into the outer shell.
STEP 9:

Time to add the ribbon or cord! Cut two pieces long enough to go around the entire bag once with a little extra.
Insert them through the loops using a pin to make things easier.
STEP 10:

Revel in your accomplishment and come back to tell me how it went! I would love to hear what you are going to do with your drawstring bags, or any personal adjustments you make.
Happy Sewing! Please share this post by pinning the below image:


So awesome and easy to follow. Keep it going.